These shelves are designed for trussed-roof attics. Your trusses will need to look like the V- or W-shapes shown in the photos on this page, and they also must have gaps between each truss of approximately 24″.
Simply place them into position, they automatically find the right level and all you have to do is to use the screws provided!
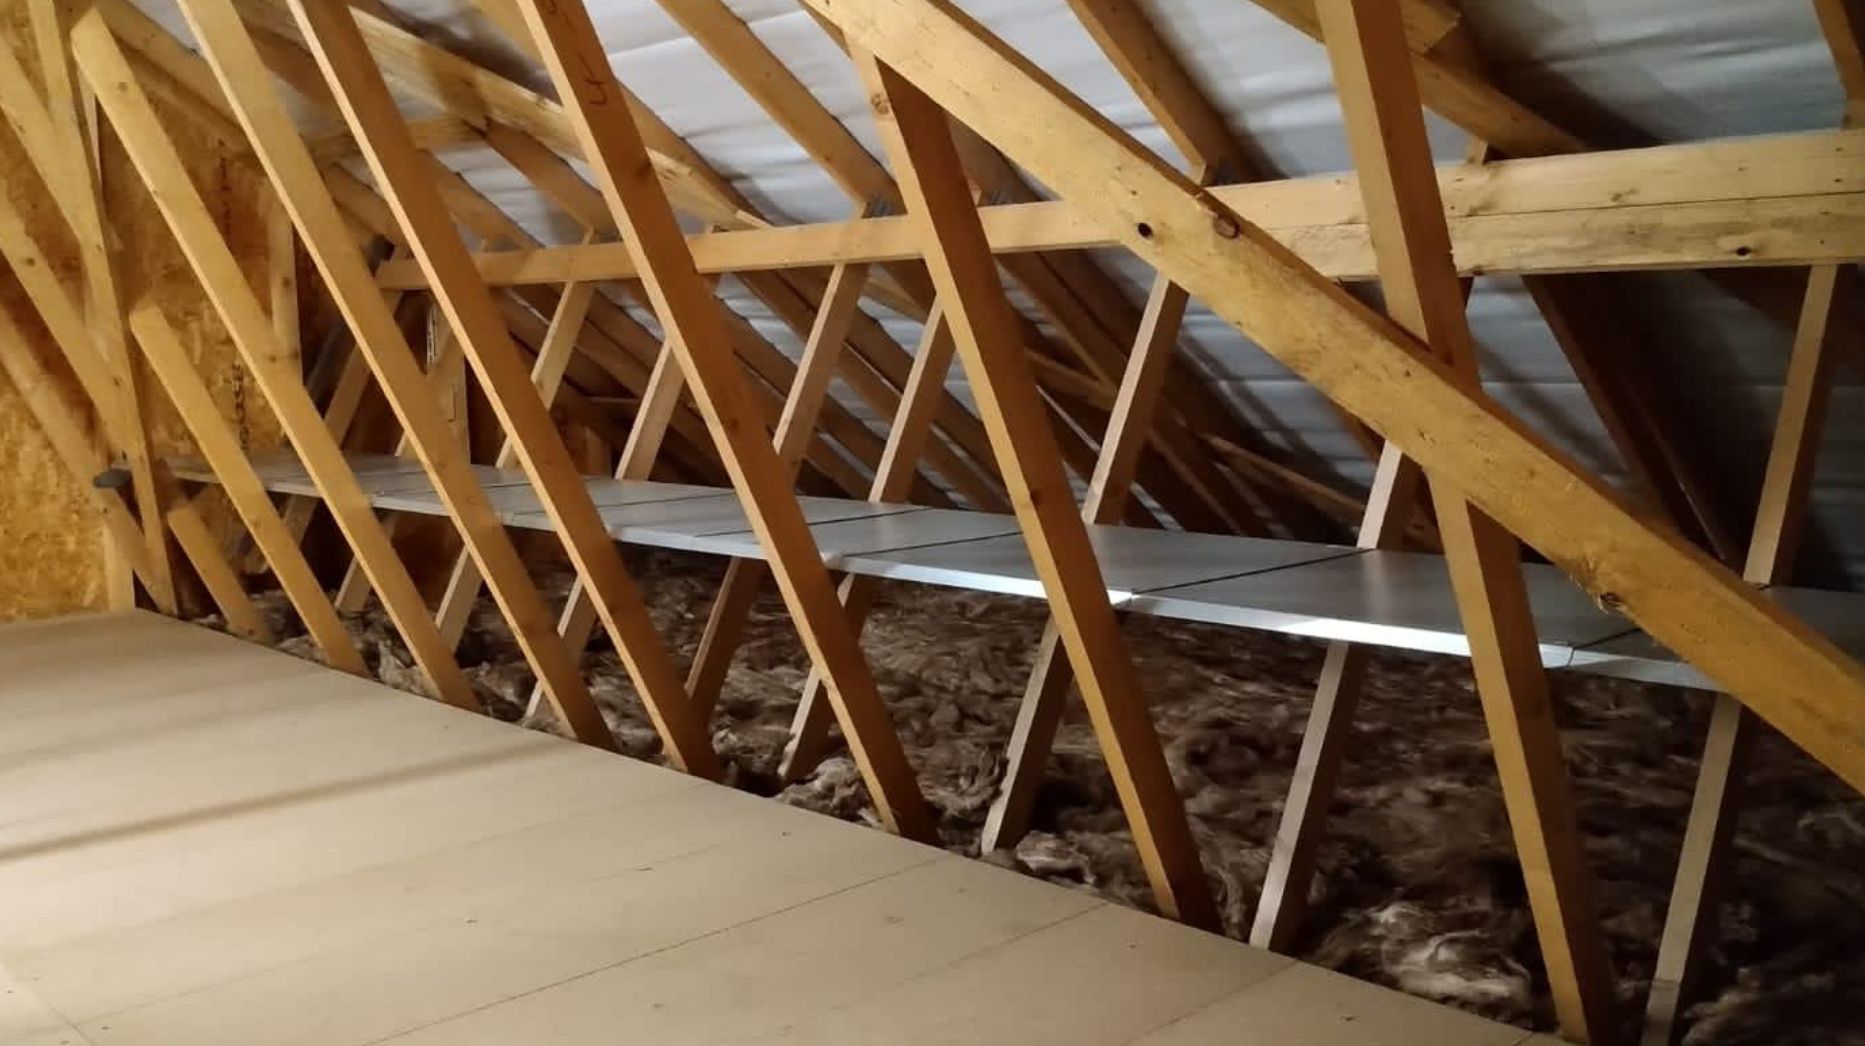
Suitable for truss-roof lofts (those are the ones with the timber in V- or W-shapes), where the gap between each truss is approx 600mm, these smart steel shelf panels can simply be placed on the trusses, where they find their own level, and then all you have to do is to secure them with the screws provided. The recommended maximum loading per shelf is 12kg,
Very fast to fit – just put in place – the shelf finds its own level and is adjustable if your trusses are unevenly spaced
Just requires a screwdriver. We even provide the screws!
Fully recyclable (made of steel)
Unique product, designed by LoftZone and made in the UK

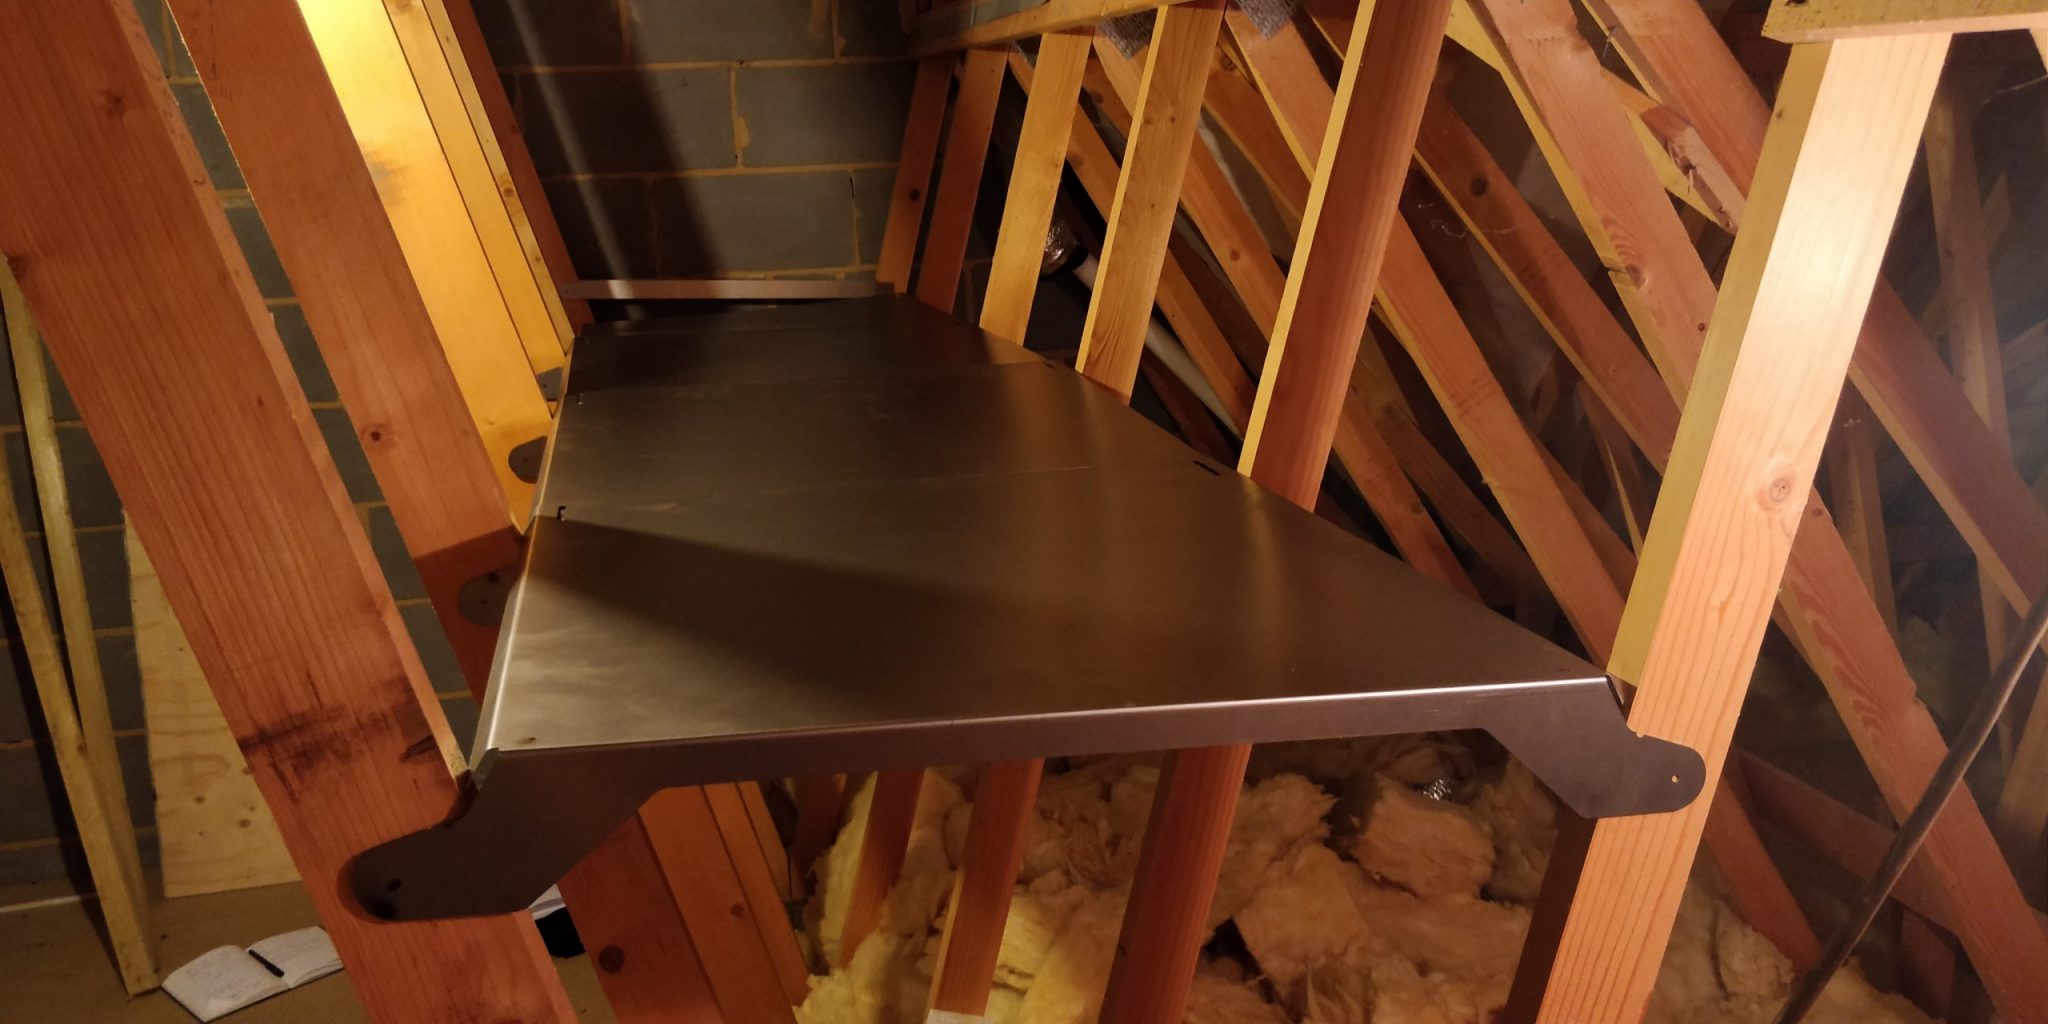
A row of LoftZone TrussShelves will consist of one square Shelf-Panel between every truss that you want to shelf, and one single End-Piece at the end of the row.
1. For each row of shelves, start with the End-Piece, and place it so that it rests on the inside of the trusses at the left-hand end of the row of shelves. You can screw this in now, or later, using the longer screws provided.
2. Then put the first Shelf-Panel in place. Its left-hand side will rest on the End-Piece, and the right-hand side will rest on the trusses. No need to screw it in yet.
3. Now put all of the other TrussShelf panels in place, with each panel resting on the previous panel on its left-hand side and on the trusses on its right-hand side.
4. When you’re happy with the positioning of all the shelves, screw them to the trusses through the holes in the lugs, as shown. Use the longer screws provided.
5. Finally, screw each panel to the one next to it, through the slot and into the hole beneath, using the shorter screws provided.
You can also download the installation instructions from here, and a paper copy should be included with your kit.
Whether you’re after individual components for custom sized decks, or complete kits for easy installation, we’ve got everything you need.
Our US site has recently undergone a rebranding from LoftZone to AtticZone, but don’t worry if you’re looking for our UK site, you can still find it at www.loftzone.co.uk.
Take a look at our rebranded site, we’re sure you’ll love it as much as our Attic boarding!